Golem Dominion


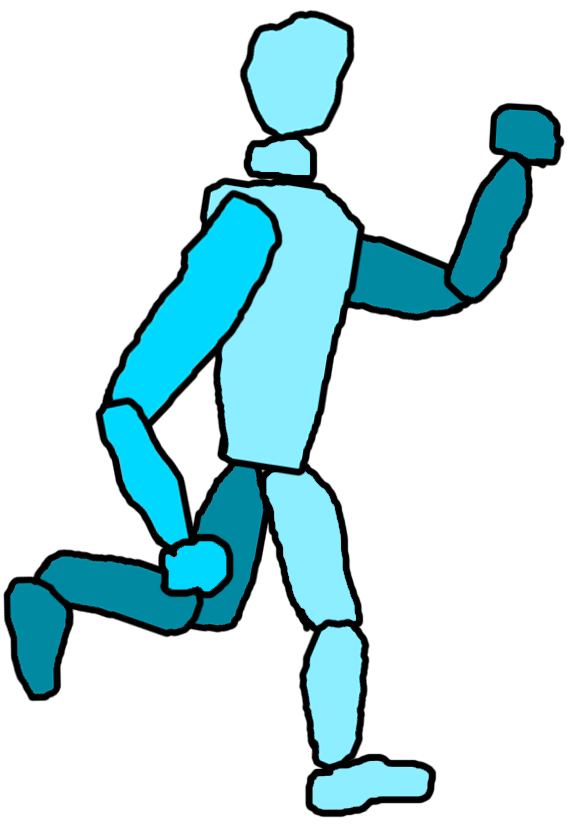
Golem Initial Draft
Initially I was working on testing the entire process. How to create a character, match up their joints and bones to get them to function, and how to create animations for them. My first design was very simple. The main character was going to be a golem, a creature made of the earth. The golem would level up as he increased in experience.
Golem Next Draft
This golem was a bit more refined. When I was looking for inspiration I found this work by Rofelrolf. Art assets are definitely not my strong suit, so I was pretty pleased with how he turned out. I used Spine 2D Skeletal Animation for games to create the animations. It was a pretty easy to pick up piece of software. I was pretty stoked with the animations I was able to build. Even had fire coming out of his feet for a double jump.
Enemy First Draft
I needed some sort of astronaut enemy. I used a basic spacesuit to simulate him and started animating him as well. I also started building out animations in Spine for the different interactions.
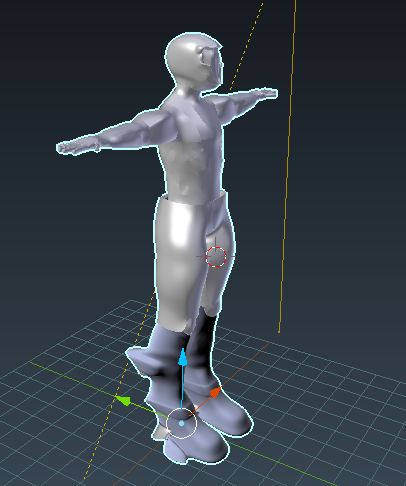
Updated Enemy
I decided to try out 3D animation and used blender as my tool. I built an udpated enemy with a variety of cool tools. Here is the basic model.
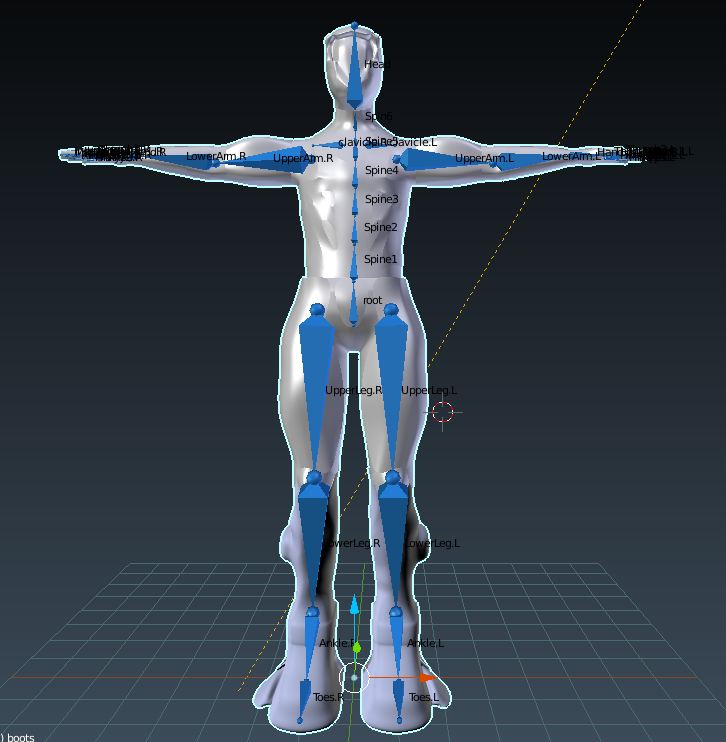
Adding Bones
Next I added bones and created a skeleton for my space man.
Texturing
The next step was texturing him. I made the different parts of him look like different types of textures: fabric, glass, metal, etc.

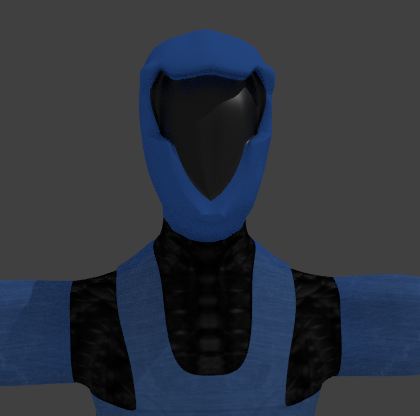
Rendering
When I rendered the character you’re able to see things like the light reflecting off the facemask, the cloth pattern of the black area, the dull sheen of the blue metal, etc.
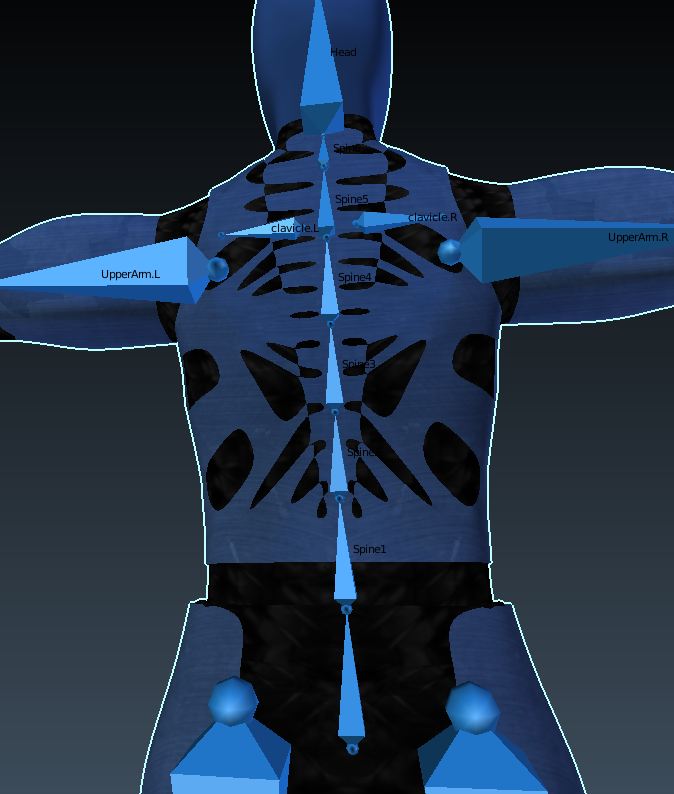
Bones in Rendered Version
Here’s a back view of the rendered version with the bones made visible.
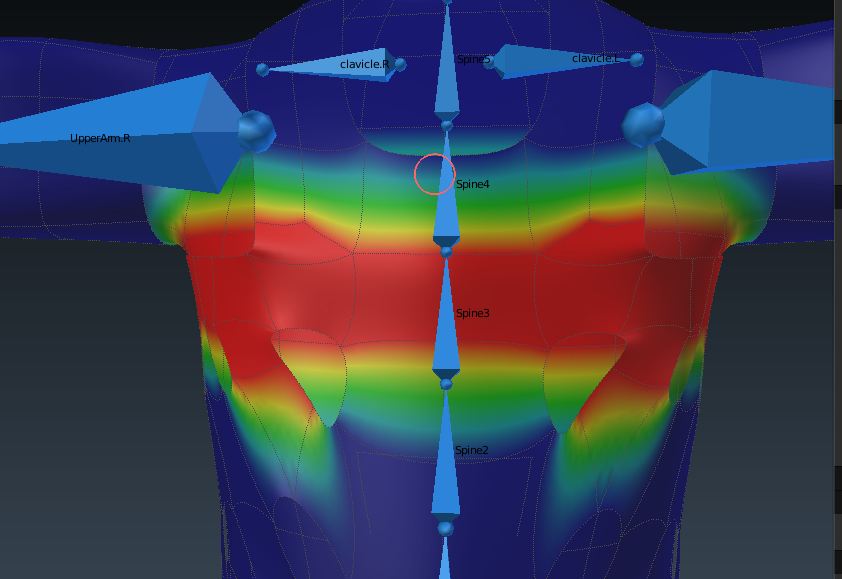
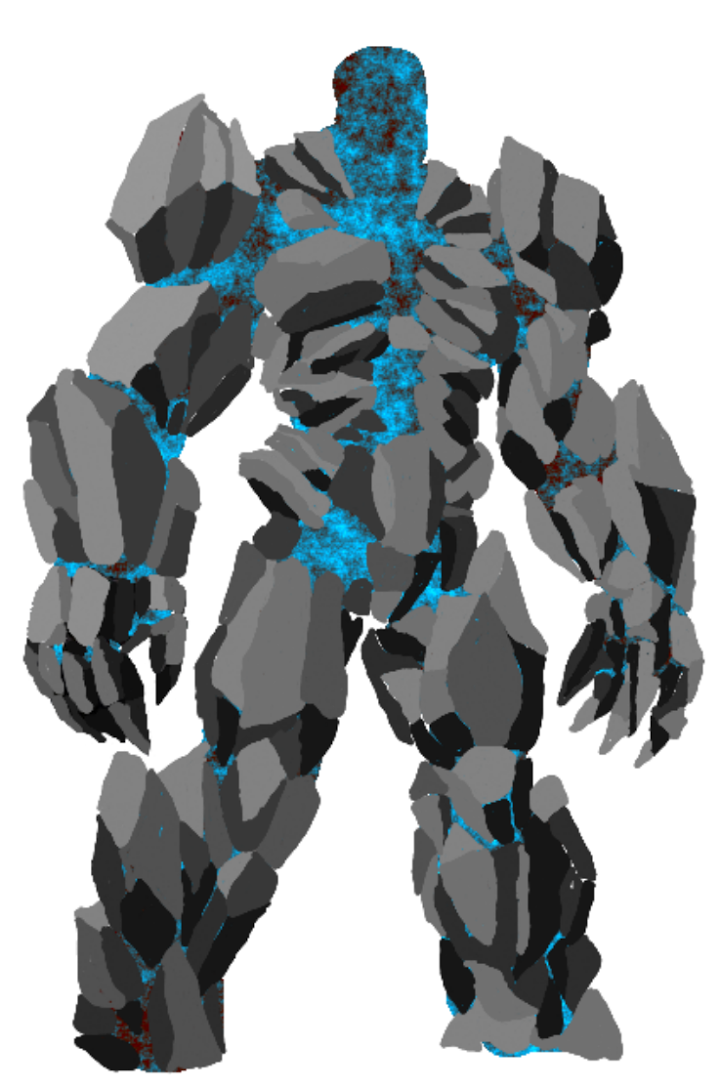
Heat Map
You have to identify which areas correspond to which bones. So in this example, when the Spine3 bone moves, the areas in red will be the primary areas affected, then the areas in yellow, green, and then light blue.
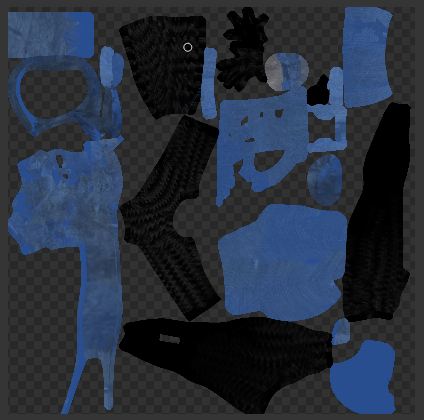
Packing
To bring over the asset into unity you need to pack it into a JSON format and import it. Each individual surface area wil be brought over. Kind of looks like someone just left some clothes on the floor.
Bump Map
The bump map is used to make areas look 3D without actually needing to create additional pixels for that. You are essentially just using shadows, like an artist would use on a box, to make it look like there’s more depth then there is.